Help
About PrintOps
Getting Started
Placing Orders
Shipping
Billing
Shopify App
Etsy Integration
Order Desk Integration
Technical Docs
Legal
Installation
The integration process is straightforward, but if you encounter any issues, please contact us.
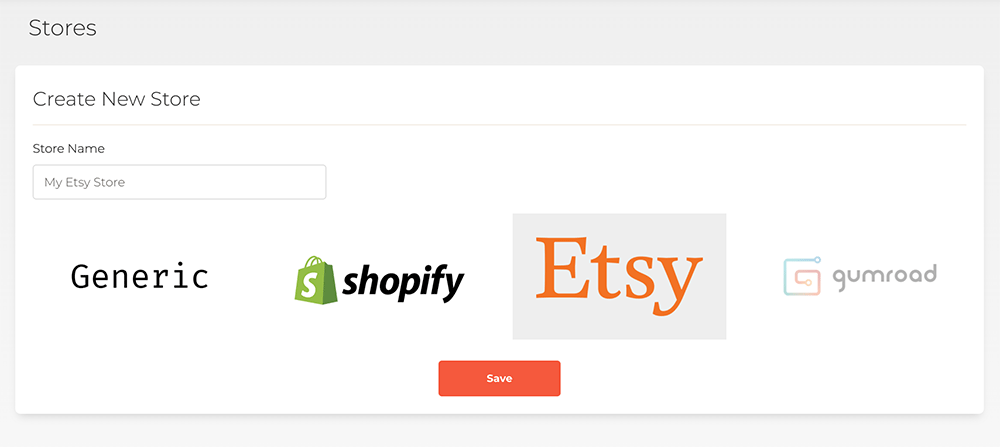
Create a store on PrintOps.
After you have create an account and confirmed your email, log into PrintOps.com.
You'll be greeted with a Welcome page that instructs you to create a store.
Click the "Create a Store" link under the "Stores" column, input a name and select "Etsy" as the store type.
Click Save.
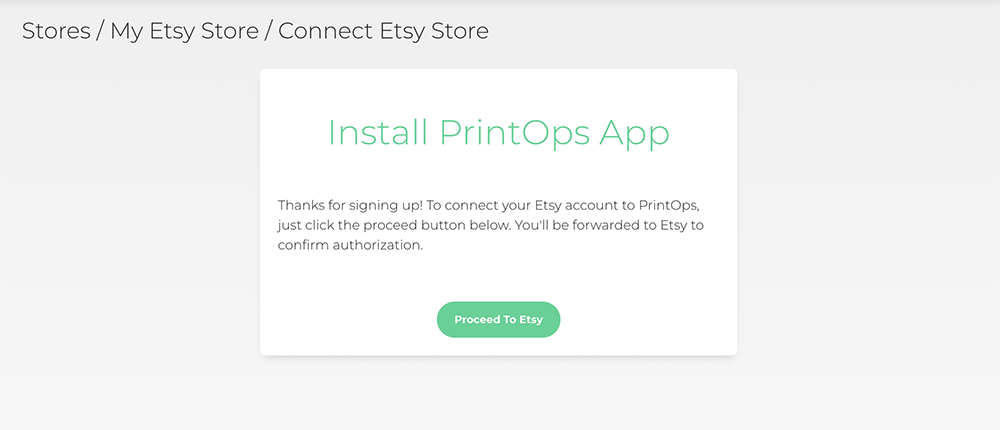
Connect to your Etsy store.
After you have created a store, you should see the "Install PrintOps App" alert. Click on "Proceed To Etsy" to authorize PrintOps to access your Etsy Store.
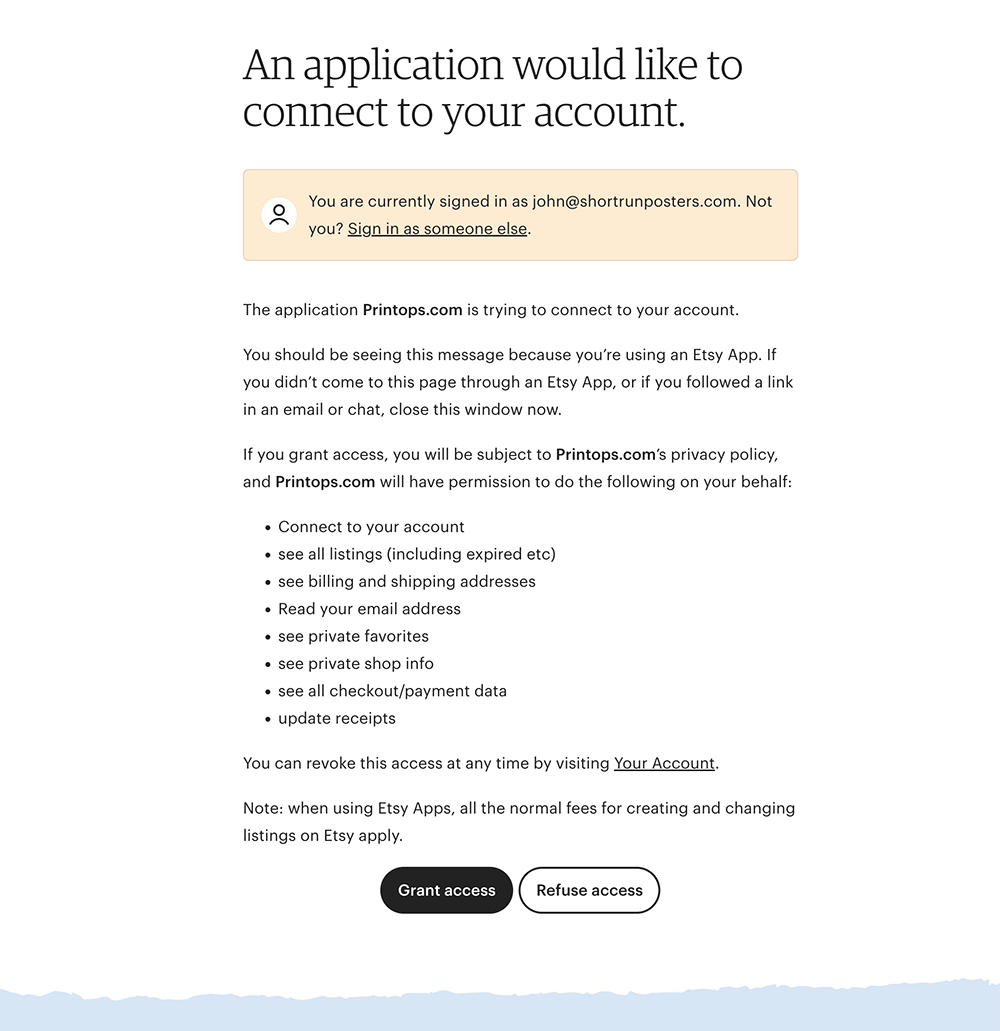
If you're not already logged into Etsy.com, you'll be prompted to do so.
Once logged in, you'll see a page that asks you to "Grant Access" to PrintOps.com for the integration.
Click "Grant Access" to proceed.
Store view
The Store view is where you get an overview of your store, see your orders, shipments and products.
To see more details about orders, shipments or products, just click the title above each section or card.
To navigate to your store, click on the "Stores" dropdown menu on the top navigation bar, and your store should appear in the list.
You can also select "All Stores" from the list that will take you to the Stores page.
Manage Etsy Details
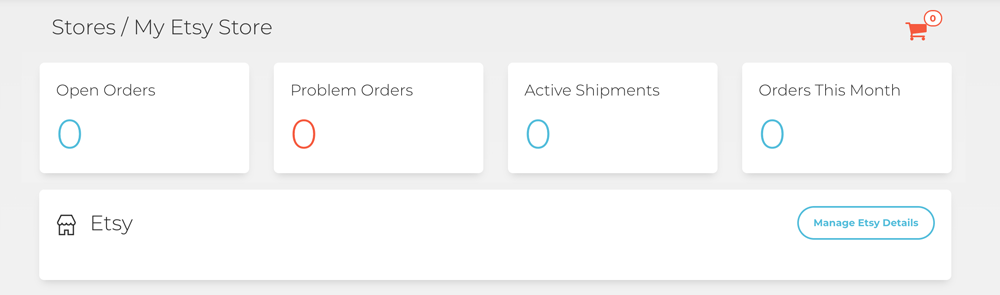
Within the Store view, if you have connected your Etsy store, you'll see a "Manage Etsy Details" button.
On the settings page, you will be able to connect your SKUs (products and variants) to products that you create on PrintOps.com.
This connection is necessary so that when an order is forwarded to us from your Shopify store, the system knows what product to produce.